 Flippd Help
How do I customize my label templates?
Custom labels are built in the label editor: go to Tools > Labels, tap the Manage Templates icon in the top right, then duplicate a template you like or start a new one and drag elements onto the label. The editor works on the web and in the mobile app.
Step-by-Step
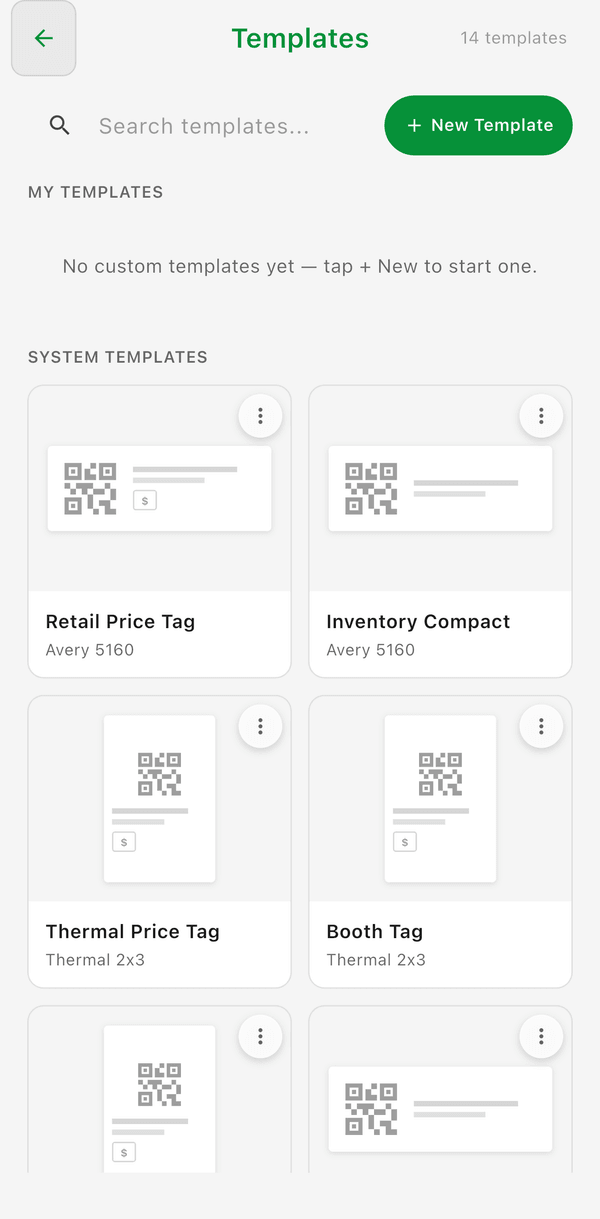
- Go to Tools > Labels
- Tap the Manage Templates icon in the top right
- Pick your starting point:
- New Template -- start from a blank label
- ⋮ > Duplicate on a template you like -- then edit the copy
- ⋮ > Edit on one of your own templates
- Tap the format bar at the top to choose the label format (Avery sheet sizes, Standard 2x7, thermal sizes from 2x3 up to 4x6, or a custom size)
- Tap + to add elements, drag them into place, then tap Save
System templates can't be overwritten -- choosing Edit on one creates your own copy named "… (Copy)" and leaves the original alone.
Elements You Can Add
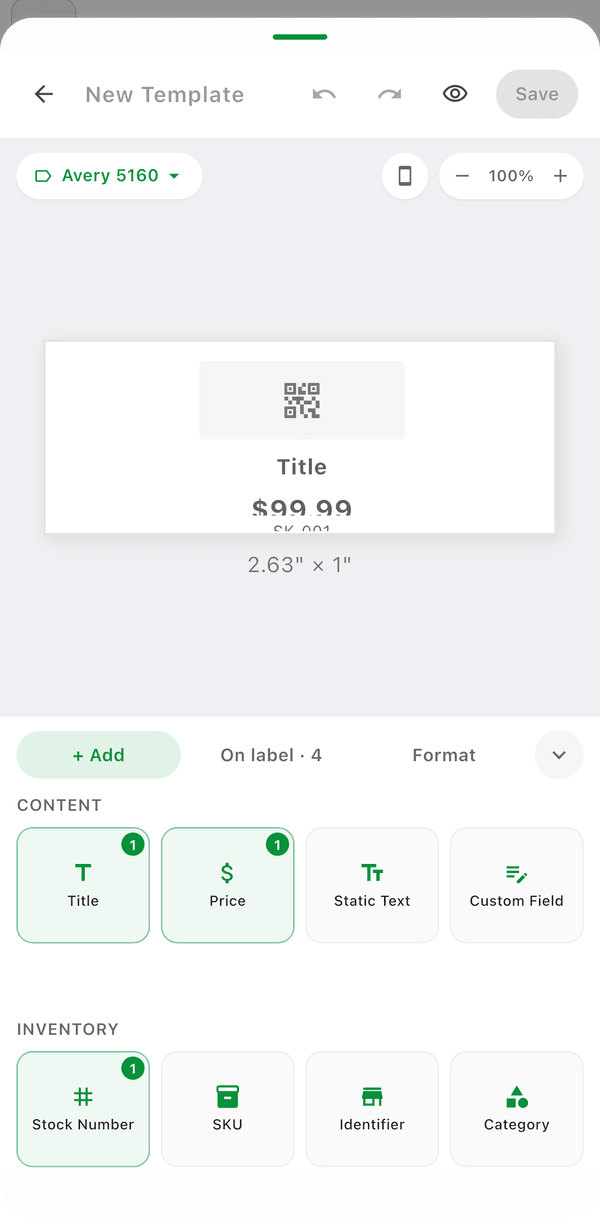
Tap + to open Add Element. A green × 1 badge on a tile means that element is already on the label -- you can add more than one of the same type.
Content
- Title -- the item's title
- Price -- list price, sale price, or cost
- Static Text -- fixed text you type yourself (store name, "All Sales Final", a booth number)
- Custom Field -- see the note in Good to Know
Inventory
- Stock Number
- SKU
- Identifier -- a fixed code (booth or vendor number) that prints on every label using this template
- Category
- Storage Location
Identifiers
- QR Code -- scans back to the item in Flippd
- Logo -- your business logo from Settings > Business Profile
Dates
- Date Acquired, Date Listed, Date Sold
Editing Elements
- Move -- drag an element; alignment guides appear as it lines up with the label edges, the center, or other elements
- Resize -- tap to select, then drag a corner handle
- Nudge -- use the arrow buttons in the styling panel for 0.01" steps (arrow keys on desktop)
- Text style -- font size slider, bold, alignment, and an optional border
- Rotate -- the rotation pill on the selected element cycles 0° / 90° / 180° / 270°; the phone icon in the header rotates the whole label
- Hide -- the eye button keeps an element on the template but off the printed label
- Delete -- the trash button removes it
- Undo / Redo -- under the ⋮ menu in the header
- Preview -- the eye icon in the header renders your template with a real inventory item through the actual print pipeline
To edit a Static Text element, tap it once to select it, then tap again to type directly on the label (or tap the small pencil chip).
Adding a Booth or Vendor Number
For a fixed code on every tag -- the number antique malls and vendor booths require:
- Tap + > Identifier
- Tap the element on the label to select it
- Type your booth number in the Identifier box below the canvas
- Position it and tap Save
The value is saved with the template, so every label printed from it carries the same code. Set it in each template you print from.
Template Ideas
- Shipping labels (4x6) with title, QR code, and SKU
- Price tags with title and price only
- Booth tags with your Identifier, price, and a QR code
- Inventory labels (Thermal 2x3 or Avery 8167) with QR code and stock number
- Jewelry tags with minimal info
Printing Labels
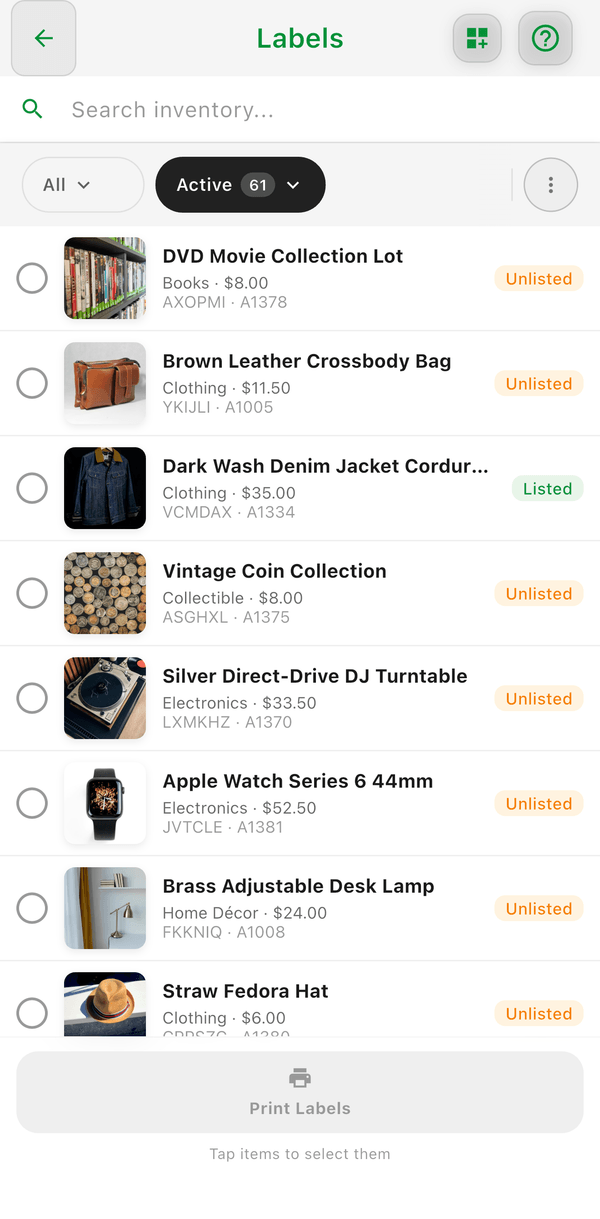
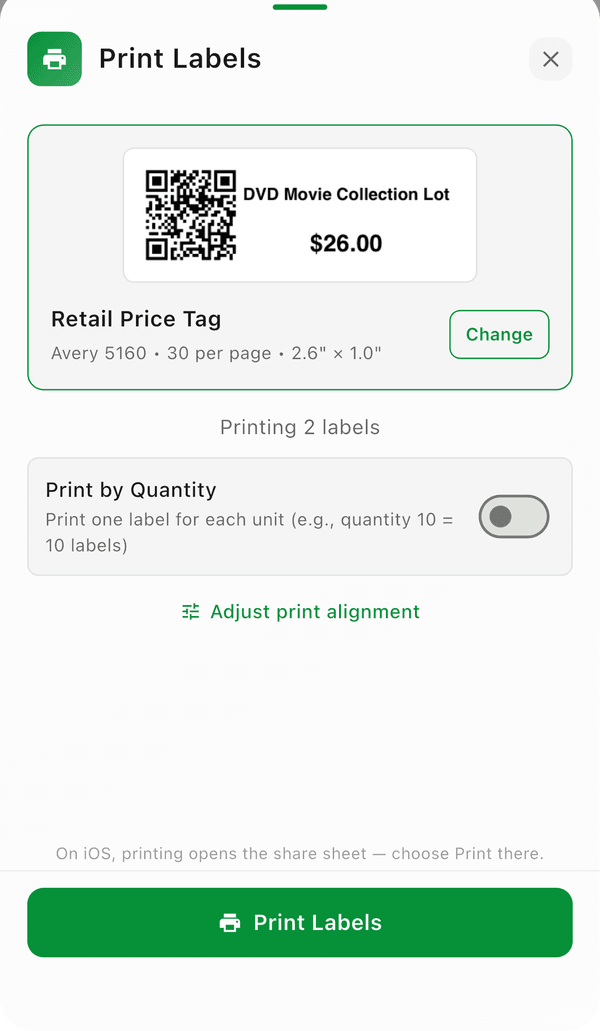
Select one or more inventory items on the Labels screen and print them together -- Flippd tracks which items have already had a label printed.
Good to Know
- Label templates sync to your account and are available on all devices, web included
- Changes to templates don't affect previously printed labels
- Test print a single label before running a batch to check alignment
- The Custom Field element can't be pointed at a specific custom field yet, so it prints blank -- use Static Text for fixed wording or Identifier for a booth or vendor code
- There is no barcode element -- the QR code is the scannable code on Flippd labels