 Flippd Help
How do I scan and save receipts?
To scan a receipt, tap Add Receipt on the expense form, or tap + on the Expenses screen and choose Scan with camera or Scan from gallery. Flippd's AI extracts the amount, date, merchant, and a suggested category automatically, and stores the receipt image in the cloud.
Step-by-Step
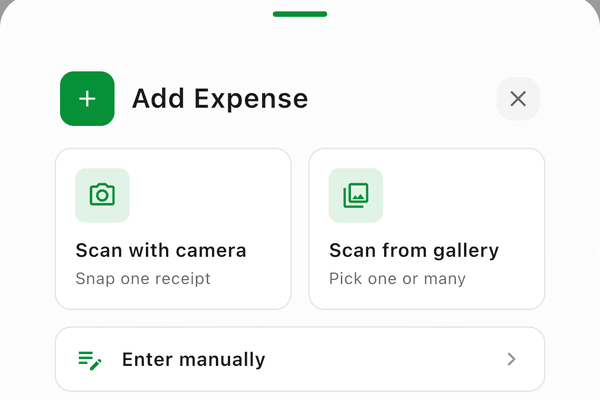
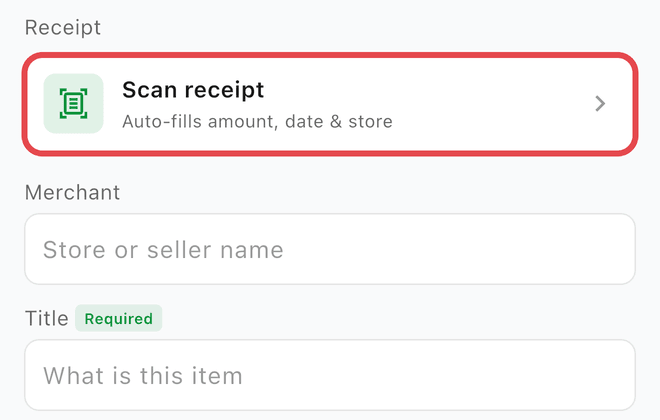
- When adding or editing an expense, tap Add Receipt and choose Take Photo or Choose from Library -- or start from the Expenses screen with + > Scan with camera / Scan from gallery
- Take a photo of your receipt (or pick one from your photo library)
- Flippd's AI tries to automatically extract:
- The amount spent
- The date of the purchase
- The merchant and a short title
- A suggested category from your own expense categories
- Verify the extracted details and adjust if needed
- Tap Save
Correcting What the Scan Got Wrong
The AI does its best, but receipts vary. If the amount, date, or merchant comes out wrong, just edit the field before saving -- your correction is what gets stored. Flippd uses these corrections as feedback to keep improving how it reads receipts, so the more you fix, the better it gets over time.
Good to Know
- The IRS recommends keeping receipts for at least 3 years -- Flippd stores them safely in the cloud
- For best results, take photos in good lighting with the receipt flat
- You can attach receipts to existing expenses by editing them
- Receipt images stay attached to each expense in the app; the spreadsheet export lists expenses without the images
- Receipt scanning has a daily allowance -- 5 scans per day on the free plan and 50 per day for subscribers. Allowances reset each day.
- Subscribers who need more than the daily allowance can request a higher limit from the app