 Flippd Help
How do I add my first inventory item?
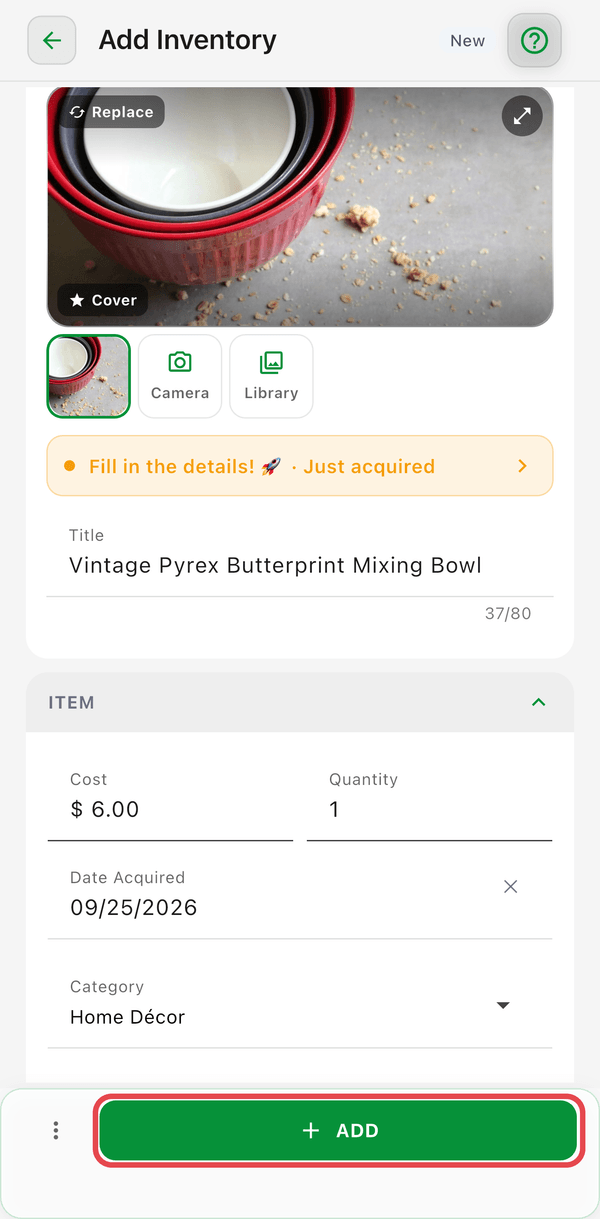
To add your first item, tap the green Add button in the middle of the bottom bar, fill in the details, and tap Save. Your item appears in your inventory with "Unlisted" status.
Step-by-Step
- Tap the green Add button in the middle of the bottom bar
- Enter the item title (required) -- what you're selling
- Enter the Cost of Good (strongly recommended -- profit and ROI need it) -- what you paid for it
- Select a category (Clothing, Electronics, etc.)
- Add photos by tapping the camera icon (up to 8 per item)
- Tap Save
Your item is now tracked in your inventory and ready to be listed for sale!
Optional Fields to Fill In
For better reports and organization, consider also adding:
- Source -- Where you got it (Thrift Store, Estate Sale, Garage Sale, etc.)
- Storage Location -- Where you're keeping it (Shelf A, Closet 1, etc.)
- Estimated List Price -- What you plan to sell it for
- SKU -- A unique identifier for your tracking system
What's Next?
After adding your first item, you can:
- List it for sale -- When you post it on a selling platform
- Record a sale -- When someone buys it
- Add more items -- Build your full inventory picture
Good to Know
- The more details you add, the better your reports and analytics will be
- You can always edit items later to add missing details
- Photos help you identify items quickly when browsing your inventory
- Long-press the Add button for other ways in: Scan & Add Item (barcode lookup), Add Multiple Photos (bulk add from photos), or Start with a receipt
- The free plan includes up to 20 inventory items; see What are the usage limits on the free plan?