 Flippd Help
How do I use Flippd for estate sales?
Set up each estate as a Source (where items came from) and as a parent Storage Location with the rooms as sublocations (where items are). Add a Storefront for sale weekend so shoppers can browse room by room on their phones. That gives you per-estate profit reporting, room-by-room inventory lists you can hand to clients, and a catalog shoppers can scan at the door, even when you're running several houses at once.
Set Up Each Estate
- Add the estate as a Source. Go to Settings > Customize Data > Sources and add a source named after the estate (for example "916 Ponytail Estate"). Every item you record from that house gets this source, so sales and profit trace back to the estate forever, even after items move.
- Add the estate as a parent Storage Location. Go to Tools > Storage locations and create a location for the address. Locations nest three levels deep: estate, room, tote.
- Add each room as a sublocation. Create "Office", "Kitchen", "Garage", and so on, with the estate as their Parent Location. Print location QR labels on the estate prints a code for every room at once; stick each on its door frame.
- Add an "Estate Sale" selling platform under Settings > Customize Data > Platforms so in-house sales stay separate from anything you later sell online.
Intake Flow (Working Through a House)
For each item you catalog:
- Tap Add, then scan the barcode or take a photo and tap AI identify to fill in the title and category.
- Use Price lookup to research what it sells for before you tag it.
- Set the Source to the estate and the Storage Location to the room you found it in.
- Print a label if you tag items physically.
Working room by room? Use bulk edit to assign the location to a whole batch at once. Bringing helpers? Invite them under Settings > Users so everyone catalogs into the same account (inviting requires Pro; helpers join on your subscription).
Sale Weekend: Publish a Storefront
- Set the items you're selling to Listed.
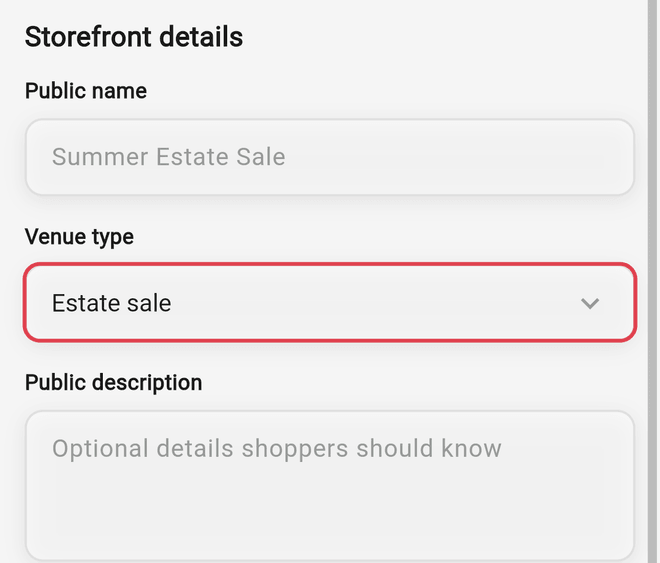
- Open Storefronts, choose the estate sale venue type, and map each room's storage location to a section name shoppers understand ("Kitchen", "Tools & Garage", "Jewelry Case"). A section includes the rooms and containers inside its location by default, so one section can cover a whole house or a single room.
- Set the start and end dates (shown to shoppers; they don't open or close the storefront), publish, and print the QR code for the front door and each room.
Shoppers browse on their own phones, sold items show a Sold marker as you record them, and nothing needs the app on their side. Turn on Let shoppers build My Picks and shoppers can bring a picks list to the table; the storefront's Checkout scans it and records those sales together. Flippd doesn't take payments, so payment stays however you run it today.
Reports for Yourself and Clients
- Everything in one house: filter Inventory by the parent location. Sublocation items are included automatically.
- One room: filter by the sublocation.
- Client inventory report: export the Excel workbook from Tools > Import / export and filter its Storage Location column to the estate before sending it. A client who wants to watch progress can be invited as a read-only Viewer.
- Profit per estate: filter by the estate's Source to see what sold and for how much, or read the Source Performance chart in Reports.
When the Sale Ends
Items usually leave the house. Some sell, some come home with you, some get donated. Update each remaining item's Storage Location to wherever it physically goes (bulk edit makes this fast). The Source stays as the estate, so per-estate profit reporting keeps working after the house is empty. Pause the storefront when the sale ends; the end date you entered doesn't close it automatically.
Good to Know
- Rooms in different houses can share a name ("Office" in two estates), but inventory lists show just the room name. Names like "916 - Office" stay unambiguous.
- Deleting an estate's parent location after a sale won't delete the rooms or any items; sublocations move up one level. Move or sell the items out first, since a location that still holds items can't be deleted.
- Track mileage to and from the estate under Tools > Mileage. Those trips are deductible.
- Leftovers that go to eBay can be linked to eBay sync later (a Pro feature). The Source still says which estate they came from, but once linked they won't appear in a Storefront.
Related Articles
- How do I set up and use storage locations?
- What are Storefronts and how do I use them?
- How do I customize my selling platforms, categories, and sources?
- How do I export my inventory and sales data?
- How do I invite my team or accountant to my Flippd account?
- How do I track business mileage for tax deductions?