 Flippd Help
How do I use Flippd for my flea market or swap meet booth?
Use Storage Locations to know what's in the truck versus at home, record cash sales against the built-in Booth / Market platform in a few taps, and publish a Storefront so browsers can scan a QR code and see everything on your table. Log table fees as expenses and let Mileage track the drive to every market.
Before Market Day
- Create storage locations for how you pack. Go to Tools > Storage locations and create "Market Bins", "Truck", and "Home Stock", or one location per tote. Put a QR label on each tote so you can scan it to see what's inside.
- Set market items to Listed. Only Listed items show up in a Storefront, so flip the status on whatever you're bringing. Bulk edit does a whole tote at once.
- Publish a Storefront. Choose the flea market venue type, map your market locations to sections such as "Vintage Tools" or "Kitchen", and print the QR code for the table. Shoppers browse on their phones while you're helping someone else. Prices show as marked; an item without a list price shows "Ask for price".
- Price-check anything you're unsure about. Use Price lookup to see current eBay listings and a link to sold results before you write the tag.
On Market Day
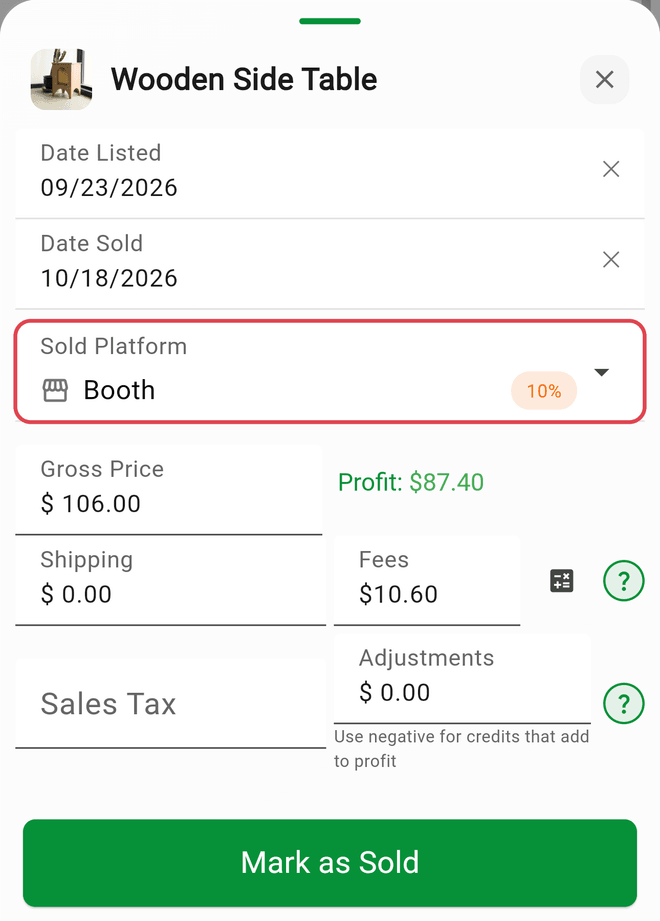
- Record every sale as it happens. Open the item, tap Sold, enter the price, and pick Booth / Market as the platform. However the buyer pays you (cash, card, Venmo), Flippd keeps the profit math straight. If a buyer takes three things, record three sales; it takes seconds each.
- Busy table? Turn on Let shoppers build My Picks in the storefront. A shopper brings their picks list to you, and the storefront's Checkout scans it and records all of those sales at once.
- Bundle deals: enter the actual price you received on each item so the profit per item stays honest.
- Table fee, parking, supplies: add them under Expenses on the day, or scan the receipt.
After the Market
- Move unsold items back to their home locations with bulk edit.
- Check Reports for the day. The Platform Performance chart shows what the market earned versus your online channels, and the Category Performance chart shows what kind of stuff sells in person.
- Anything that's been to three markets without selling belongs online. Tools > Aging lists what's been Listed past your pace.
Features You Can Skip
- eBay sync matters only if eBay is also a channel for you. If it is, connect it (a Pro feature). Items linked to eBay never appear in your Storefront, so keep eBay-listed stock out of the market bins.
- Invoices are for buyers who want paperwork; most market shoppers don't.
Good to Know
- Booth / Market and Local are default platforms. Add a custom one per recurring market if you want to compare venues in Reports.
- The drive to and from the market is deductible. Under Tools > Mileage, set Trip Tracking to Automatic and forget about it.
- Bought a whole box lot from another vendor? Log it as a bulk purchase so the cost splits across the items.
- The Coach reads your numbers nightly and will point out which categories are carrying your markets.