 Flippd Help
What are all the ways to add inventory to Flippd?
Tap the + button to add one item by hand, or long-press + to open the Add menu with faster options: scan a barcode, add a batch of photos, or start from a receipt. You can also duplicate items, add items inside a bulk purchase, import a spreadsheet, or sync your eBay store.
Which Method Should I Use?
| You have... | Best way to add |
|---|---|
| One item in your hand | Tap + and fill in the details |
| A product with a barcode (including books) | Scan & Add Item |
| A pile of items you've already photographed | Add Multiple Photos |
| A receipt from a sourcing run | Start with a receipt |
| Several similar items (same brand, different sizes) | Duplicate an existing item |
| A pallet, lot, or mystery box | Add items inside a Bulk Purchase |
| A spreadsheet from another app | Import from Tools > Import / export |
| An eBay store | Connect eBay and sync |
Every method below creates normal inventory items you can edit afterward.
1. Tap + to Add One Item
The fastest path for a single item. Tap the green + button in the bottom navigation, fill in the title, cost, and any other details, add photos, and tap Add. The item is created as Unlisted.
On the web version, the + Add button in the sidebar does the same thing. Press A or N while viewing the inventory list to open a new item from the keyboard.
See How do I add a new item to my inventory? for every field on the form.
2. Long-Press + for the Add Menu
Press and hold the + button to open the Add menu. It groups every quick way to get items in, plus shortcuts for expenses and mileage:
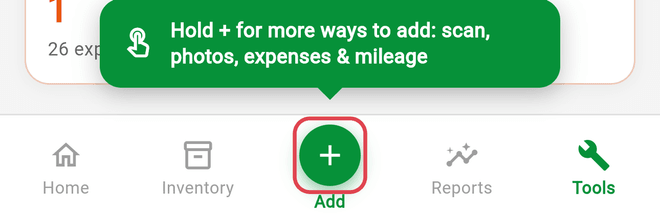
- Scan & Add Item -- scan a product barcode and let Flippd fill in the details
- Add Inventory -- the same manual form as a single tap
- Add Multiple Photos -- create one item per photo, up to 20 at a time
- Start with a receipt -- photograph a receipt and turn its line items into inventory
- Add Expense and Add Mileage -- for the rest of your bookkeeping
The big green button at the top of the menu is your quick action. It starts as Scan & Add Item and, once you've used the quick options a few times, switches to whichever one you use most. The plain Add Inventory form never takes that spot.
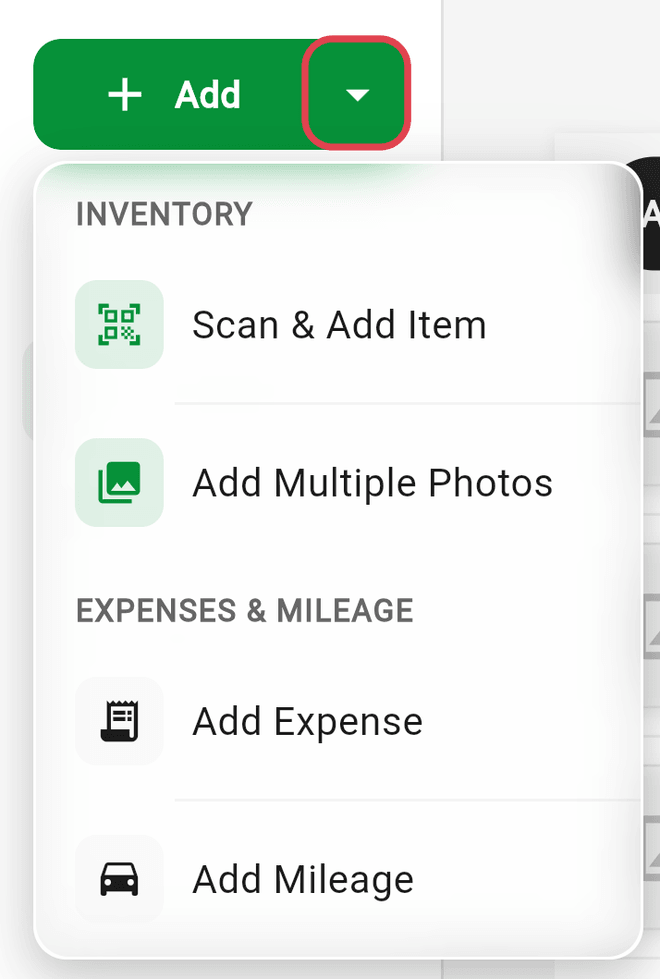
On the web version, tap the arrow next to the + Add button to open a dropdown with Scan & Add Item, Add Multiple Photos, Add Expense, and Add Mileage. Click + Add itself for the manual form. Start with a receipt is mobile-only.
3. Scan & Add Item (Barcodes and Books)
Point your camera at a product barcode and Flippd looks it up in a database of millions of products, then pre-fills the title, brand, category, and a product image. Add your cost and quantity, tap Add to Inventory, and the scanner reopens for the next item.
- Works with UPC, EAN, and ISBN barcodes -- for books, scan the ISBN barcode on the back cover
- If a barcode isn't found, you can still type the title and cost, and the barcode is saved to the item for later
- Also available from the Scan QR Code or Barcode icon on the Inventory screen (scan an unknown barcode and Flippd offers to add it) and inside a Bulk Purchase
See How do I scan a barcode to quickly add items to inventory?
4. Add Multiple Photos (Bulk Add)
Already snapped photos of a haul? Choose Add Multiple Photos, select up to 20 photos, and Flippd creates one inventory item per photo.
- Auto-generate title and category with AI is on by default -- each photo is analyzed and given a suggested title and category. Turn it off to use the photo's filename as the title instead.
- Optionally set a Source and Category that apply to every item in the batch
- Cost isn't captured here, so open each item afterward (or use bulk edit) to add what you paid
This is the quickest way to get a day's sourcing into the app so it's counted, then fill in details later.
5. Let AI Identify an Item From Its Photo
When you add a photo to a new item whose title is still blank, Flippd automatically analyzes the photo and fills in a suggested title and category. It never overwrites a title you've already typed.
To run it on demand, tap a photo on the item and choose Identify & Categorize with AI. Photo analysis has a daily allowance (see What are the usage limits on the free plan?).
Sourcing in a store and not sure it's worth buying yet? Snap Decisions prices an item or a whole pile from one photo, then adds what you buy to inventory in a tap.
6. Start With a Receipt
Choose Start with a receipt from the Add menu, photograph the receipt (or pick it from your library), and Flippd:
- Saves the receipt to Proof of Purchase first, so you keep it for your records even if you stop here
- Reads the line items, prices, and quantities with AI
- Shows a Review items screen where you can edit each line, change cost and quantity, and untick anything you don't want
- Creates the items you selected and links each one to the receipt
Turn on Also estimate list prices on the review screen to have Flippd research a suggested list price for each item as it goes.
You can also do this from a receipt that's already saved in Proof of Purchase. Each read uses one of your daily receipt scans. See How do I attach a proof of purchase or receipt to an inventory item?
7. Duplicate an Existing Item
Have five of the same shirt in different sizes? Swipe an item from left to right on the inventory list and tap Dupe, or open the item and choose Duplicate from the ... menu. Choose how many copies (1 to 99) and whether to copy the photos. Copies start as Unlisted.
See How do I duplicate or clone an inventory item?
8. Add Items Inside a Bulk Purchase
For pallets, wholesale lots, and mystery boxes, create a Bulk Purchase under Tools > Bulk purchases and add items from inside it. Every item you add there is linked to the lot, and you can spread the lot's cost across them.
From the purchase you can add items manually, scan barcodes straight into it, or add a batch of photos. See How do I track bulk purchases and liquidation lots?
If one item is really several pieces bought at one price, you can also turn it into a bundle and add components. See How do bundles work and when should I use them?
9. Import From a Spreadsheet or CSV
Coming from another app or a spreadsheet? Go to Tools > Import / export, upload an Excel or CSV file, and Flippd's AI maps your columns to the right fields automatically. It understands exports from eBay, Mercari, Poshmark, Vendoo, and generic spreadsheets.
- Up to 5,000 items per import, files under 20 MB
- Include a Status column and items import as Unlisted, Listed, or Sold
- Import works on both mobile and the web version
See How do I import inventory from a CSV or spreadsheet?
10. Sync Your eBay Store
Connect eBay under Settings > Integrations > eBay and Flippd imports up to 2 years of your active listings and sold items, with real sale prices, eBay fees, and shipping label costs on recent sales. After the first import, new listings and sales are picked up on later syncs automatically.
If you already have inventory in Flippd, unmatched listings wait on a review screen so nothing is duplicated. The sync is one-way: Flippd reads from eBay and never changes your eBay store.
See How do I connect my eBay account to Flippd? and Why do I need to review imported listings?
11. Siri and Keyboard Shortcuts
- iPhone and iPad: say "Add an item in Flippd" or use the Add Item App Shortcut in the Shortcuts app to open a new item straight from your Home Screen
- Web version: press A or N on the inventory list to start a new item
Good to Know
- Every method counts toward the same inventory allowance. The free plan includes 20 items; subscribers are unlimited. See What are the usage limits on the free plan?
- Scan & Add, AI photo identify, and receipt reading each have a daily allowance that resets every day
- Items you add by hand, by scan, by photo, or from a receipt start as Unlisted. Imports and eBay sync keep the status from the source
- Taking new photos with the camera is mobile-only. On the web version you can still upload photos and receipts from your computer
- Whatever method you use, you can edit any item afterward to add cost, storage location, or more photos
Related Articles
- How do I add a new item to my inventory?
- How do I scan a barcode to quickly add items to inventory?
- How do I duplicate or clone an inventory item?
- How do I track bulk purchases and liquidation lots?
- How do I import inventory from a CSV or spreadsheet?
- How do I connect my eBay account to Flippd?
- How do I add and manage multiple photos for an item?